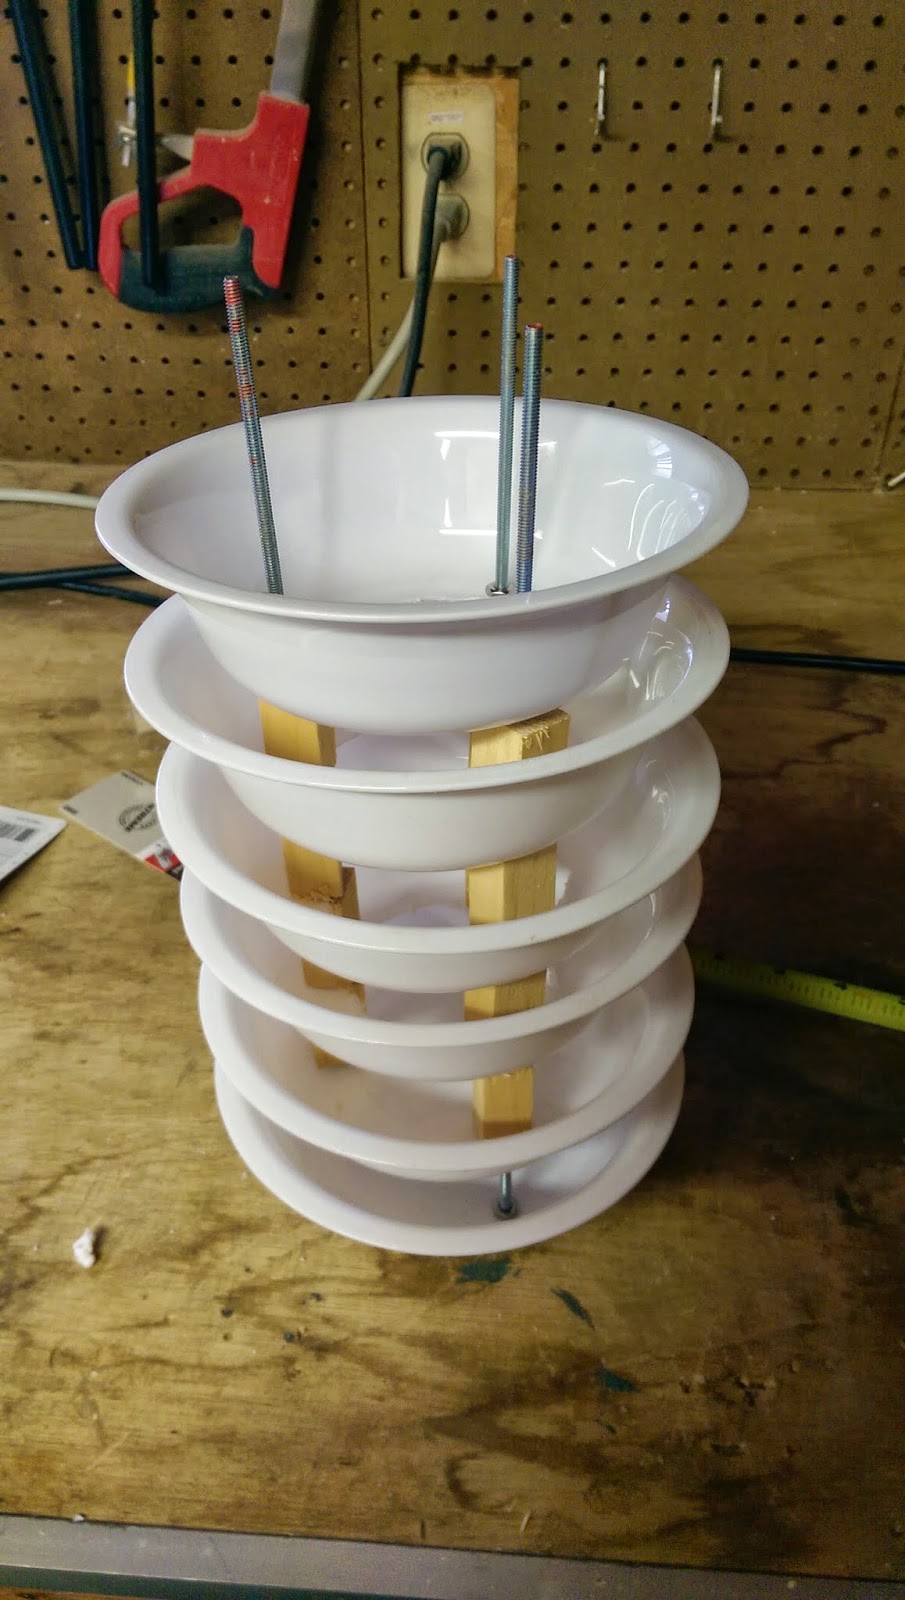
Part 1 - Solar Radiation Shield
After doing some research on underground weather I found that it is recommended to use a radiation shield. So doing some searches I found that they are pretty darn expensive, translation to my wife, you want to spend HOW much on a hunk of metal (cheapest I found was $50 plus shipping)?
So I asked myself, why do I need a radiation shield? I found some interesting information here, which comes out with the takeaway that with no breeze the temperature can be up to a degree(s) higher than when in a radiation shield.
However there must be a cheaper way.. insert the DIY approach! Go to the local dollar store and purchase about 6 plastic bowels. Stop at Home Depot and purchase three 1/8 inch diameter, 12 inch long rods and a box of stainless nuts. and a bunch of wood dowels to space the bowls apart.
Tape the bowls together so you can drill three holes in the same place in all the bowls. Using a drill press or a drill drill holes and then remove the tape.
Take the rods and place double nuts at an even distance from the top of the rod and this will hold your top cover in place. I used stainless wing nuts on the top to make access to my electronic components easier in the future.
Next you need to take all but 2 or 3 bowls and cut the middle of the bowl out so we have a large center chamber to put the temperature sensor.
Take the rods and place double nuts at an even distance from the top of the rod and this will hold your top cover in place. I used stainless wing nuts on the top to make access to my electronic components easier in the future.
Lastly we take and cut the hunks of wood into small spacers, then drill the center of the spacers out. Placing everything on top of each other will make a cheap DIY radiation shield.
Next in Part 2 - Prototyping the Arduino remote temperature sensor


